Showing posts with label thanksgiving. Show all posts

Wednesday, November 27, 2013

Mashed Honeyed Carrots - Creative Mistake

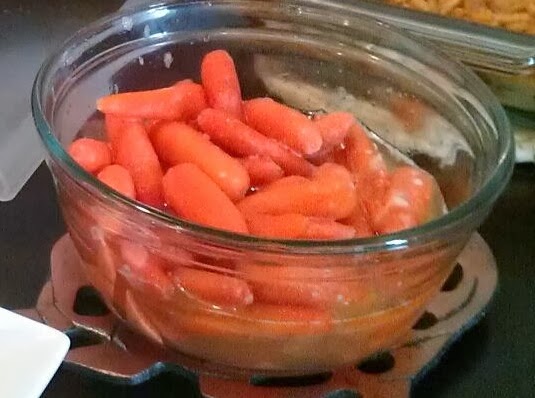
I set out to make honey carrots in my crock pot, but in my focus to make Pumpkin Soup, I dropped the ball with the carrots.  I meant to cook in the slow cooker for a couple of hours and then pick up where I left off for a few more when I got to work, but I accidentally left it on all night on low - over 6 hours!  Needless to say, they were soft in the morning...but still tasted good.

I brought my little crock pot to work and was pretty embarrassed by the results, but what can I do...I promised to bring carrots.  As I sat at my desk, lamenting at my terrible mistake, I made a decision...I'm making Mashed Honeyed Carrots and telling everyone that was what I intended to do!  Well, except for I told everyone about my mistake, but that's me...I'm not good at lying.

Okay, Ingredients:

2 lbs Baby Carrots
5 tbsp Honey
5 pads of Butter

Directions for crock pot:

Put carrots, honey and butter in and turn on.   The end.

LOL!  Okay, I set it on low and accidentally left on overnight (over 6 hours).  I would have shut it off after a couple of hours and plugged it in the lunch room after my first break, set it to low and it would have been perfect for lunch.  But, I'm me...so this is what I ended up with...mushy carrots.


And then, as I sat at my desk, I remembered that there was a potato masher in the break room and I ran down there with my brilliant idea of Mashed Honeyed Carrots...yeah, sounds like I meant to do that...except that I had already ratted myself out!  Oh, well...I committed to this new idea wholeheartedly and mashed the heck out of those carrots!  


And my Mashed Honeyed Carrots was born...


I removed some excess liquid out so it wasn't soupy and I did take the lid off and turned it up on high to reduce some of the liquids down.


Pumpkin Soup - perfect for a cold Thanksgiving

It's potluck time for work and I signed up to do one of my favorite dishes to make, Green Bean Casserole, but another coworker signed up for it too. Well, no point in having the same dish twice, so I thought really hard about what else I could make. PUMPKIN SOUP!!! It's gonna be a cold day (relatively speaking, here in Los Angeles) and that seems like a very comforting type of food...so, I was excited thinking about it all day.  Thinking about spending time in my kitchen cooking this up and then I got this notion in my head - I don't want to make from a can of puréed pumpkins...I want the real deal!


So, after work, I went to Fresh and Easy down the street from my work and saw they sold some Sugar Pie Pumpkin, perfect for my soup! They are much smaller than the average jack-o-lantern pumpkins, but I may have gone overboard when I got 5! Yes, portion control has always been my problem...I always cook for the size of an army and it's usually actually for a handful...oh, well! I love to cook!

Anyway, here's the full list of Ingredients I used (forgive me, these are guesstimates - I am bad at keeping track of ingredients, but I'm trying):

5 Sugar Pie Pumpkins
18 cups chicken broth
1 tablespoon of olive oil (I ran out)
8 tablespoons of butter (would have only used 6, but I ran out of olive oil)
2 bay leaves
1 large onion, finely chopped
1/2 a celery (about 6-8 ribs), finely chopped
6 tablespoons of flour
5 teaspoons of ground thyme
Hot sauce, to taste
4 cups heavy cream
3 teaspoons of ground nutmeg 

Making Pumpkin Purée:

Bring a big stock pot little more than halfway filled with water to a boil. A little salt goes a long way.

Wash the outside of the pumpkin thoroughly with warm water, NO soap!

Slice in half and take out the seeds and stringy middle crap! (You can save the seeds to grow or roast - I threw them out, ain't nobody got time for that! Well, I don't this week. I tried saving spaghetti squash seeds last week and they got moldy on me because I got busy and forgot about them. Anyway, I digress...) place in stock pot of hot water. Repeat until all pumpkins are done. Each time, I try to push the newest pumpkin to the bottom with my wooden spoon. Add more water of needed.

I let boil for about 25-30 minutes and I turned off and draine the water and let cool. I'm impatient, so I threw some ice in there and added more water. That turned into hot water pretty quickly, so I pulled them out and let then sit.


Scoop out the inside into a blender. It came out pretty easy, but the skin would fall apart too and rip into pieces. I added some of the chicken broth to help purée it and let it rip.  Took me about 3 batches and maybe yielded about 12-15 cups? I'm so sorry I can't remember, but it was around there!


Time to make the soup:

I heated my stock pot over medium heat and added oil and butter to melt. 

Add bay leaves, celery, and onions. Season with salt and pepper. Cook until soft, about 8-10 minutes. Add flour and thyme, stir up and cook flour for about a minute or so.


Start stirring in the chicken broth and bring to a boil.

Stir in the pumpkin and mix into soup. Simmer for about 10 minutes, stirring occasionally to make sure nothing is burning at the bottom. (I have partial videos of this on Instagram, but I forgot to take pictures because I got so into cooking - boyfriend had to take the video)

Add in the cream, nutmeg and hot sauce to taste. Reduce heat to low and and keep warm until you serve, or in my case. I cooked for another 10 minutes and transferred into my crockpot to take to work.


Soups are rarely photogenic, huh? I'll try to take a better picture and post later!

Better, but not really pictures...


Monday, November 25, 2013

Throwback Thanksgiving Meal - Thanksgiving 2011


Well, it's Thanksgiving week and I'm sure most people are as excited as me about all the yummy food and company of loved ones.  This is going to be a special Thanksgiving for me since I will be meeting my boyfriend's family for the first time!  Unfortunately, I will not be doing any cooking, but I sure will be doing a lot of eating!  Not cooking is making me reminisce about 2011…when I made a giant Thanksgiving feast for me and my roommate at the time…just because I wanted to cook.  I even printed out my menu.  So here it is…my Thanksgiving Throwback to 2011, complete with the menu!


Appetizer – Tuna Tartare


5 oz sushi quality tuna
1 avocado
Wonton wrappers
2 tbsp Soy Ginger Sesame Sauce
Cooking spray


Preheat oven to 375 degrees.  Coat mini-muffin pans with cooking spray.  Place 1 wonton wrapper in each cup and shape to muffin pan to make a cup.  Bake until they are golden brown, about 5-6 minutes.  Remove from oven and let cool.


Chop tuna into very small cubes or pieces, put in medium size bowl.  Slice up the avocado to small size, similar to tuna, and add to bowl with tuna.  Add Soy ginger Sesame Sauce and stir well.  Chill until ready to serve.  Since this doesn’t take long, I suggest preparing it no earlier than an hour before serving, since you are dealing with raw fish.  When ready to serve, spoon into wonton cups and enjoy!


Turkey Roasted with Butter and Champagne


Turkey – average cooking time is about 13 minutes per pound.
Salt & Pepper
Garlic Powder
Minced garlic
Butter
Bottle of Champagne
2-3 celery stalks – cut in 2 inch lengths
5 pearl onions
1 apple – if needed, cut to fit in turkey cavity
Rosemary


You can brine your turkey overnight before you cook it…I did, but I can’t remember what I used.  I will update if I do remember.


Preheat oven to 500 degrees and put rack at the lowest level to make room for your bird.


Place roasting bag in roasting pan and carefully place turkey inside.  Be careful not to puncture the bag to keep all the juices and champagne inside while cooking. 


Separate the breast and skin and insert pads of butter in between – do as much as you can or want to, makes for moist breast!


Stuff the inside of the empty cavity (make sure you remove the giblets) with the rosemary, apple, celery, pearl onions…put as much as you can.


Pour champagne all over your turkey, inside the bag.  Soften some butter and massage butter all over the outside of the turkey.


In a small bowl, mix together salt and pepper, garlic powder and any other spices you want to use.  Massage all over buttered turkey along with minced garlic.


Loosely twist the bag opening and loosely knot or fold over.  You want it to close off, but you need to be able to get in and out of it as you cook to baste the turkey.


Roast at 500 degrees for about 30 minutes.  Remove from heat and reduce oven temperature to 350 degrees.  Open the bag and baste with the juices at the bottom.  Take your time and get everything.  Close up the bag again and return to the oven.  Baste every 45 minutes.  Your last baste, baste with melted butter or oil to crisp  up the skin and you can leave the bag open, if it looks like it needs to get some color, but you will want to do this when it’s almost done so you don’t dry out your turkey.  You want to make sure your bird is a least 165 degrees, and you check in the breast, outer thigh and inner thigh areas.  If they’re not all at 165 degrees, continue cooking.


While it wasn't a part of this meal, it is relevant to the subject of Thanksgiving.  Click for my Turducken/Cornturduck blog post as an alternative to your regular turkey.

Coming Soon:

Cheesy Garlic Mashed Potatoes


Potatoes Au Gratin


Green Bean Casserole

Click for Pumpkin Soup recipe


Mushroom Gravy from Giblets


Honey Carrots - this link is for my Mashed Honeyed Carrots...


Stuffing from Croutons

Pumpkin Cheesecake 

Sunday, September 29, 2013

Turducken - of sorts...Introducing, the Cornturduck!!!


My boyfriend requested I make a Turducken for Thanksgiving.  Having never made a Turducken before, I told him I had to practice.  And as crazy as I am about cooking and making way too much food, I actually recognized that I shouldn’t make a WHOLE turkey wrapped around a whole duck wrapped around a chicken!  I thought of other options of how I could accomplish such a feat…after all, I had to learn how to debone a whole bird – 3 of them, to be exact.


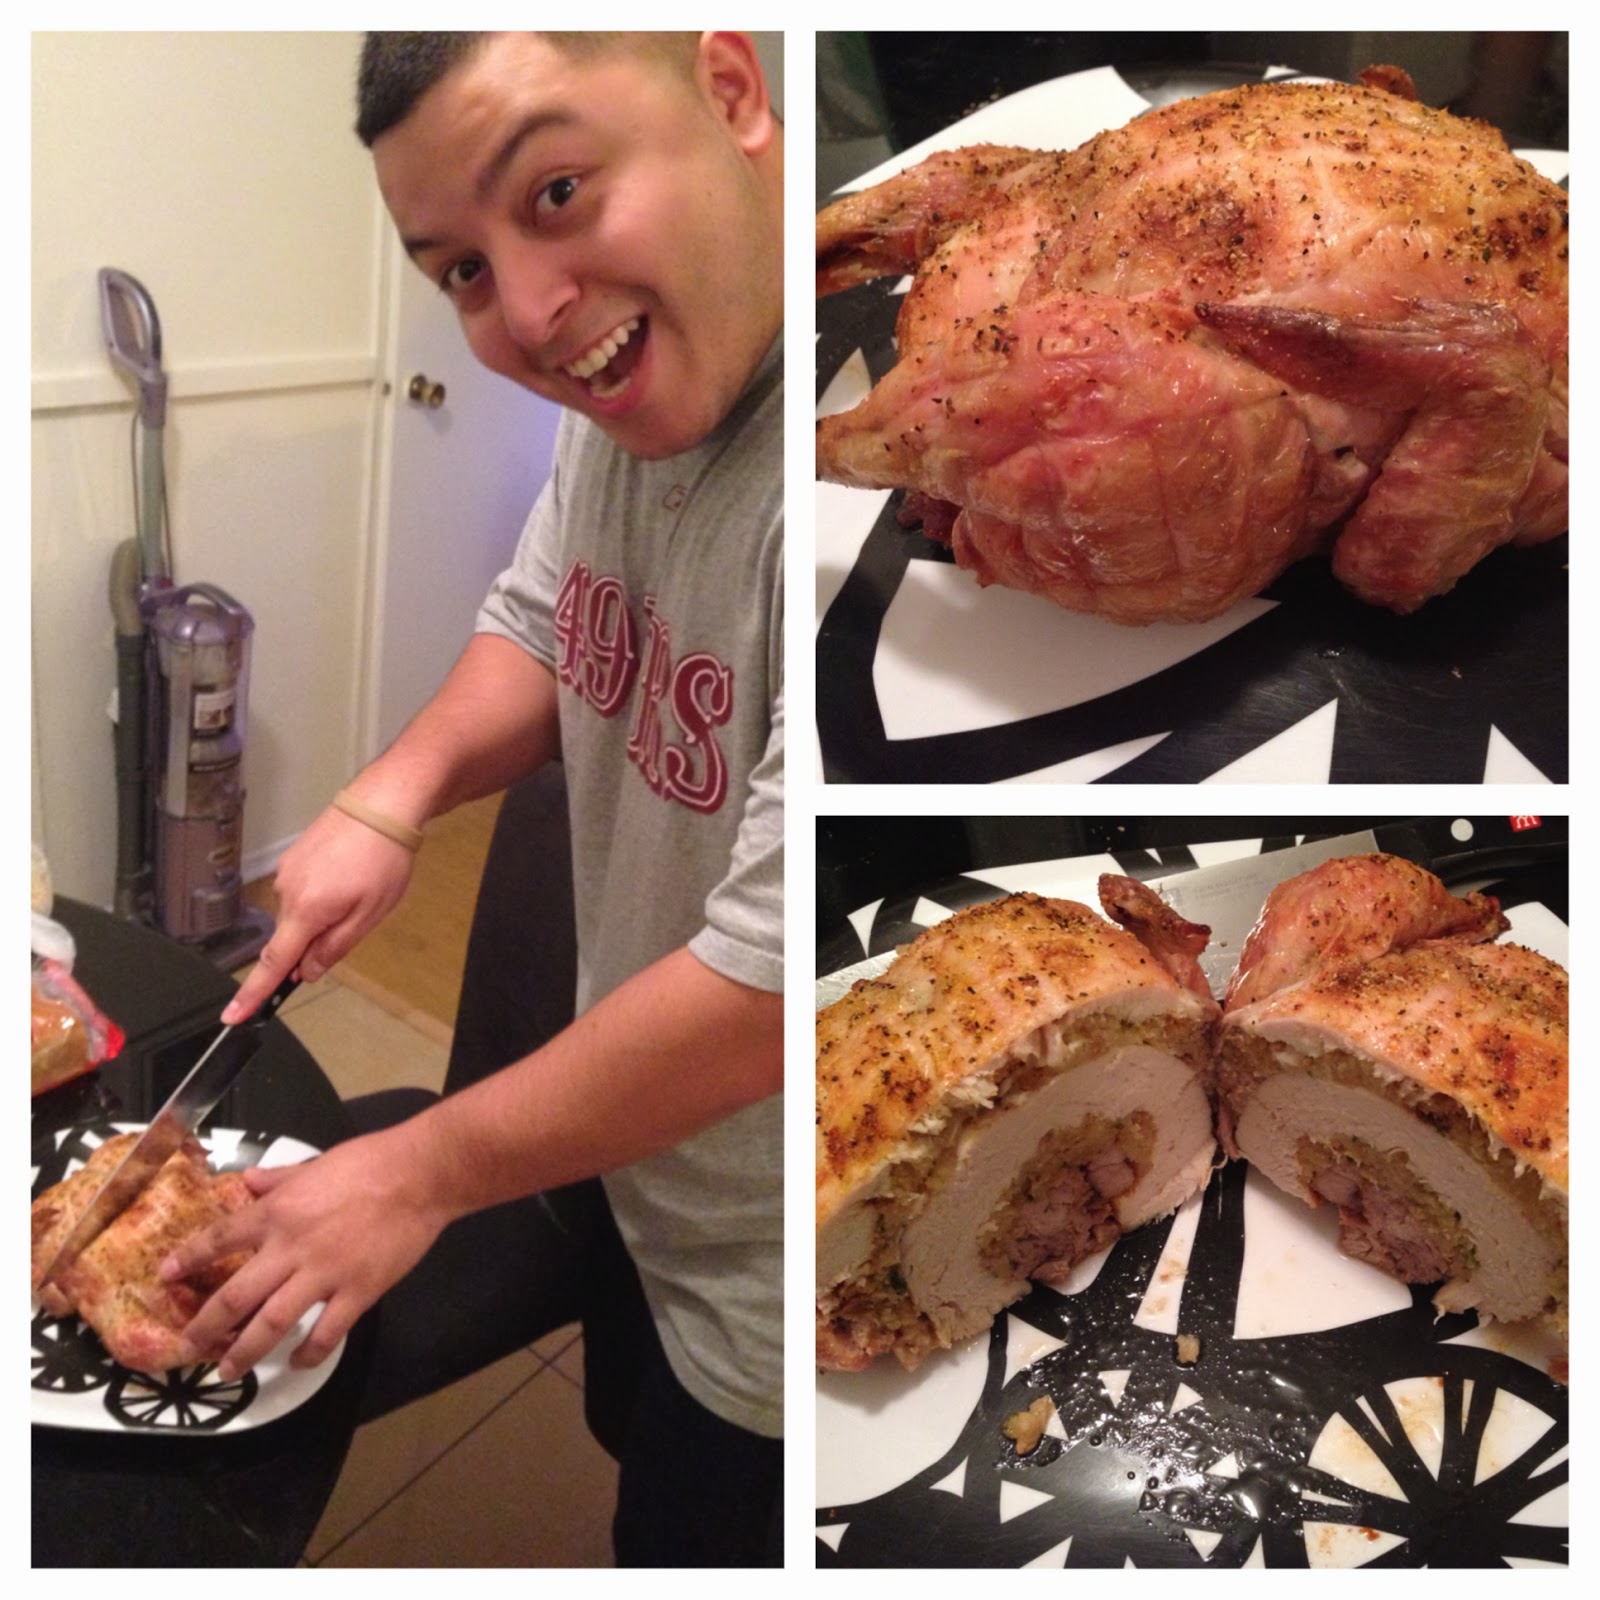
Well, when I finally decided I was going to just wrap a turkey breast around a duck breast around a chicken breast, it dawned on me…CORNISH GAME HEN!!!  So, I bought two Cornish game hens, a turkey breast and a duck leg/drumstick, and my project began. 


The turkey breast was boneless, so that was easy.  The duck was just the leg and thigh, and going to be buried deep in this clusterfowl, so I wasn’t worried about how that looked getting deboned.  The Cornish game hen was another story.  This was going to the outside, the presentation and it needed to be perfect.  I googled “how to debone poultry” and clicked on a few links, but my favorite was from The Artisan Table.  Here is the link.


My boyfriend was in charge of the iPad with instructions and reading them to me and I got my hands dirty.  We had two birds to practice on and I’m very proud to say that I was happy with the final product.


So, here’s what you need to put together a Turducken, or in my case, a Cornturduck:


Typical Turducken will require about a 16 lb turkey, 4 lb duck and 3 lb chicken with the duck and chicken completely deboned and the turkey mostly deboned, except for the wings and legs – need those to make sure it still looks like a turkey!

My Cornturduck, I used 2 cornish game hens (deboned except for wings and legs), boneless turkey breast and boneless duck thighs.

Stuffing – you can use stove top or make however you usually do. 


Toothpicks and Kitchen twine (I was lucky enough to have this perfectly sized cooking net wrap from my turkey breast that I used to hold my birdies together)


Directions for Assembly:


Preheat your oven to 375 degrees.  It does take some time to put this bird together, so you may want to do it at the start or ask a helper to do so midway through your birdie assembly.


Take your outside bird (turkey or Cornish game hen) and lay it skin side down on a clean surface – like a large cutting board.  Season as you would like – salt, pepper, I add butter to make it juicy.  Cover with a layer of stuffing and put in extra in the leg and wing cavities to help keep them up once it’s all put together.


Grab your next birdie and season both sides, then lay it skin side (or what would be skin side, if it’s not skinless too) on top of the stuffing and I added some more butter to make it juicy.  This would be the duck for traditional Turducken or turkey breast for my Cornturduck.  Before I did this, I did flatten and even out my turkey breast with a mallet first and I did have to cut to fit in the area.  My dog LOVED the turkey I cooked up for her as a result of the extra meat!  Anyway, back to the directions, cover with a layer of stuffing.


Repeat the previous step with your last birdie – chicken for a Turducken or duck thigh for my Cornturduck.  I also made sure this fit in the area, seasoned both sided and added butter and a layer of stuffing.  Now it’s ready for assembly!


As I mentioned, I got lucky with a wraparound net I had on hand, but I would have used toothpicks and twine to close this hybrid birdie shut.  You would need an extra set of hands for this I either way.  To close with toothpicks and twine, gently bring the outside bird’s outside edges together to close up and look like a whole bird.  Push toothpicks through both sides going down and then lace the kitchen twine around the toothpicks to hold it all together.


Carefully turn your Frankenbirdie over and place in your roasting pan breast side up.  Gently rub seasoning on the outside.  I am notorious for putting pads of butter between the skin and breast meat, and I think you know why by now.  Funny side note about me, I was never really a fan of butter – didn’t really butter my bread, I just plain avoided it, but it sure does make for delicious food when cooking!


Now you’re ready to cook this baby!  I would treat it like you would roasting any bird and if you need pointers, check out my Thanksgiving post and there are directions for making a Turkey.  Put in your preheated oven and baste every 30 minutes or so to prevent from drying out.  Cook until the thighs are 180 degrees and stuffed area is 165 degrees – check 2-3 different places.  


I hope you enjoy this meal…it’s like Thanksgiving any time of the year!!!  Happy eating!!!